Creating New Tasks
In this tutorial, we’ll implement functionality to add new tasks to our task list. We’ll update our UI to include a scrollable task list and a floating action button that opens a dialog for adding new tasks.
Step 1: Add the Plus Icon to your project
Section titled “Step 1: Add the Plus Icon to your project”Firstly, we need to add the Plus icon to our project icons.
Create a new file at lib/icons/Plus.tsx and add the following code:
import { Plus } from 'lucide-react-native';import { iconWithClassName } from './iconWithClassName';iconWithClassName(Plus);export { Plus };Step 2: Create an AddTask Button Component
Section titled “Step 2: Create an AddTask Button Component”Create a new file at components/AddTask.tsx and add the following code:
Step 3: Update the TaskDialogue Component
Section titled “Step 3: Update the TaskDialogue Component”We need to update our TaskDialogue component to handle both editing existing tasks and creating new ones.
We will do this by adding onSave as a new optional prop to the TaskDialogue component. This prop will be called when the user saves a new task. If the task is new, we will call the onSave prop and the return early from the function. If it’s an existing task, we will update it and close the dialog.
-
Let’s start by updating the
TaskDialoguePropsinterface to include the newonSaveprop, then pass it as a prop to theTaskDialoguecomponent:components/TaskDialogue.tsx interface TaskDialogProps {onSave?: (task: ITask) => void;task: ITask;setTask: (task: ITask) => void;setShowDialog: (showDialog: boolean) => void;showDialog: boolean;}function TaskDialogue({ onSave, task, setTask, setShowDialog, showDialog }: TaskDialogProps) {// Rest of the component...} -
Next, let’s call
onSaveprop conditionally in thehandleSaveTaskDialogcomponent:components/TaskDialogue.tsx const handleSave = () => {const nextTask = {...task,title: editedTitle,category: editedCategory,};setTask(nextTask);// If onSave is defined, call it and return earlyif (onSave) {onSave(nextTask);return;}setEditedTitle('');setEditedCategory('');setShowDialog(false);};
Step 4: Update the HomeScreen Component
Section titled “Step 4: Update the HomeScreen Component”Finally, let’s update our HomeScreen component inside app/index.tsx to manage tasks with React state and add the ability to create new tasks:
import * as React from 'react';import { ScrollView, View } from 'react-native';import { Text } from '@/components/ui/text';import { Task } from '@/components/Task';import { AddTask } from '@/components/AddTask';
interface ITask { id: number; title: string; category: string; isChecked: boolean;}
export default function HomeScreen() { const initialTasks: ITask[] = [ { id: 1, title: 'Task 1', category: 'Category 1', isChecked: false, }, { id: 2, title: 'Task 2', category: 'Category 2', isChecked: true, }, { id: 3, title: 'Task 3', category: 'Category 3', isChecked: false, }, ]; const [tasks, setTasks] = React.useState<ITask[]>(initialTasks);
const handleAddTask = (title: string, category: string) => { const nextId = tasks.length > 0 ? Math.max(...tasks.map((t) => t.id)) + 1 : 1; setTasks([...tasks, { id: nextId, title, category, isChecked: false }]); };
return ( <View className="bg-background flex-1 items-center justify-center gap-5 p-6"> {initialTasks.map((task) => ( <Task key={task.id} task={task} /> ))} </View> <View className="flex-1 flex justify-between bg-background"> <View className="flex flex-row justify-center"> <Text className="pt-20 text-foreground font-bold text-6xl"> HallPass </Text> </View> <ScrollView contentContainerStyle={{ paddingHorizontal: 24, paddingVertical: 16, }} > {tasks.map((task) => ( <Task key={task.id} task={task} /> ))} </ScrollView> <View className="relative flex items-center"> <AddTask onAdd={handleAddTask} /> </View> </View> );}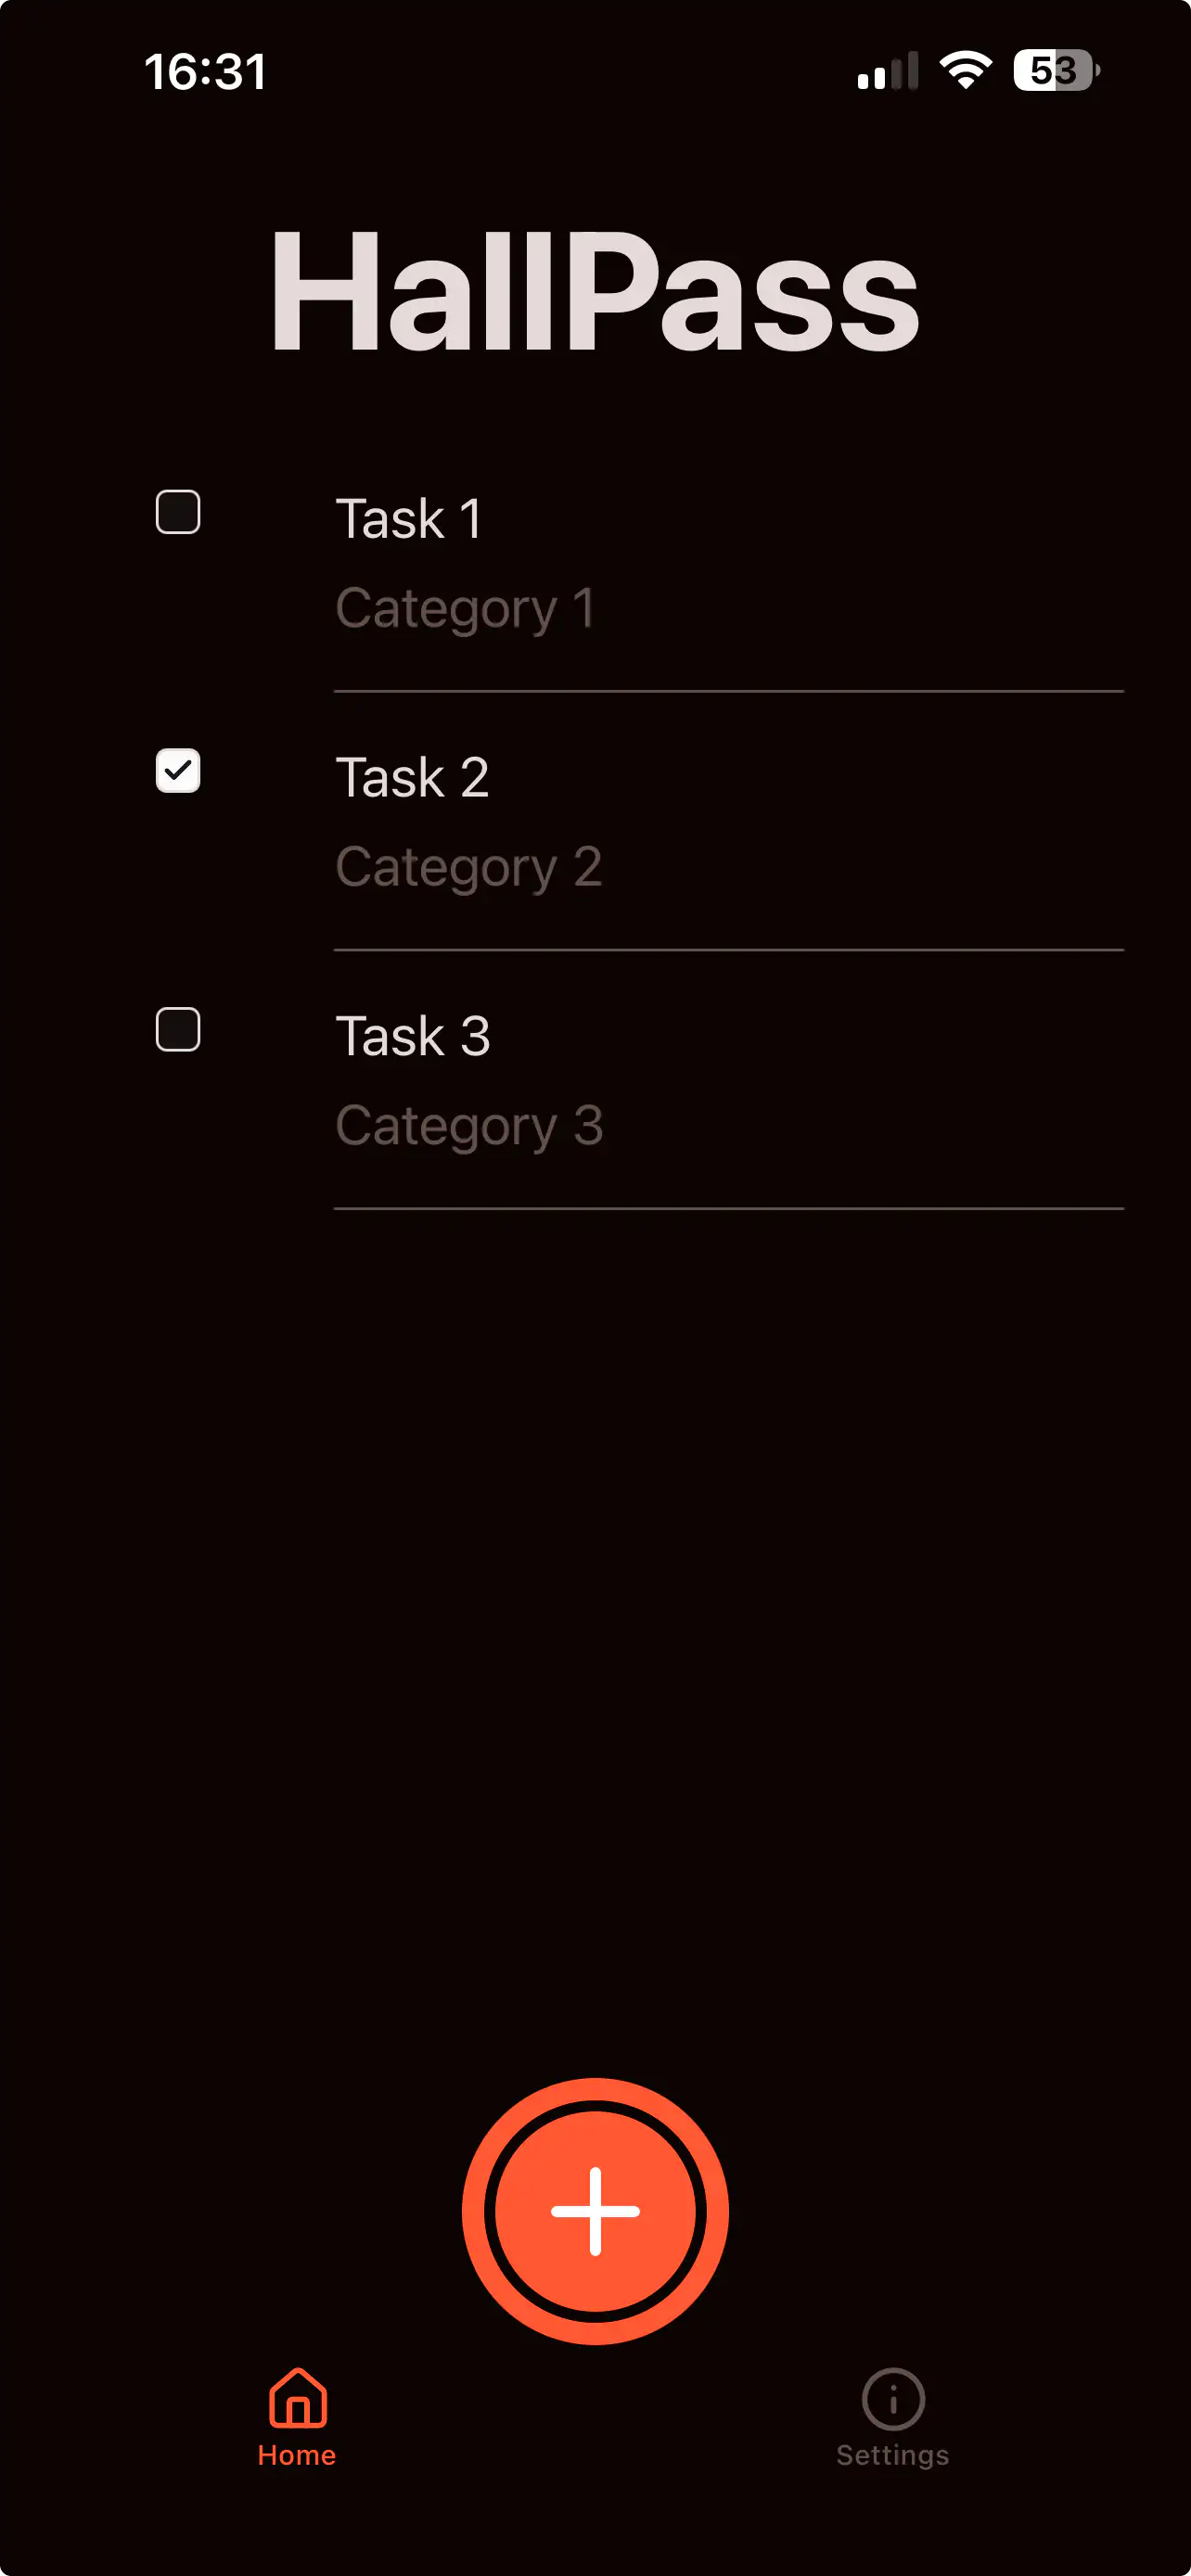
How it all works together
Section titled “How it all works together”- The
HomeScreencomponent manages the list of tasks with state - It passes the
handleAddTaskfunction to theAddTaskcomponent - The
AddTaskcomponent opens a dialog when the user taps the FAB - The
TaskDialogcomponent handles the creation of new tasks - When the user saves a new task, the
handleAddTaskfunction is called, which adds the new task to the list
Testing your changes
Section titled “Testing your changes”After implementing these changes:
- You should see a floating ”+” button at the bottom of your screen
- Tap the FAB to open the dialog
- Enter a title and category for the new task
- Tap “Save changes” to add the task to the list
- You can still edit existing tasks by long-pressing on them
- As you add more tasks, you can scroll through the list to see all of them
Next Steps
Section titled “Next Steps”In the next tutorial, we’ll look at how to save our tasks to local storage so they persist between app sessions.