🖥️ Adding an image to the Game model
In this guide, we will add an imageUrl field to our Game model. This will allow us to store the URL of an image for each game.
Understanding Database Schema Changes
Section titled “Understanding Database Schema Changes”When building applications, it’s common to need to update your database schema as your application evolves. Prisma makes this process straightforward with its migration system.
1: Update the Prisma Schema
Section titled “1: Update the Prisma Schema”First, we need to modify our Prisma schema to include the new imageUrl field in the Game model.
Open the prisma/schema.prisma file in your code editor, and add the following code:
2: Create a Migration
Section titled “2: Create a Migration”After updating the schema, we need to create a migration to apply this change to our database. Run the following command in your terminal:
npx prisma migrate dev --name add_image_url_to_game_modelThis command will:
- Generate a new migration file
- Apply the migration to your development database
- Generate an updated Prisma client
The migration file will look something like this:
-- AlterTableALTER TABLE "Game" ADD COLUMN "imageUrl" TEXT;3: Source images from the Internet
Section titled “3: Source images from the Internet”Before we can add actual image URLs to our seed data, we need to find some images to use.
Open your seed file at prisma/seed.ts.
Look carefully at the game titles in the seed data.
const games = [ { title: "The Legend of Zelda: Breath of the Wild", description: "An open-world adventure game set in the kingdom of Hyrule.", price: 59.99, rating: 4.9, releaseDate: new Date("2017-03-03"), }, { title: "The Witcher 3: Wild Hunt", description: "An action RPG set in a fantasy world full of monsters and magic.", price: 39.99, rating: 4.8, releaseDate: new Date("2015-05-19"), }, { title: "Red Dead Redemption 2", description: "An open-world western adventure game.", price: 59.99, rating: 4.7, releaseDate: new Date("2018-10-26"), },54 collapsed lines
{ title: "God of War", description: "An action-adventure game based on Norse mythology.", price: 49.99, rating: 4.9, releaseDate: new Date("2018-04-20"), }, { title: "Minecraft", description: "A sandbox game where players can build and explore their own worlds.", price: 26.95, rating: 4.8, releaseDate: new Date("2011-11-18"), }, { title: "Fortnite", description: "A battle royale game where players fight to be the last one standing.", price: 0.0, rating: 4.5, releaseDate: new Date("2017-07-25"), }, { title: "Cyberpunk 2077", description: "An open-world RPG set in a dystopian future.", price: 59.99, rating: 4.0, releaseDate: new Date("2020-12-10"), }, { title: "Among Us", description: "A multiplayer game where players work together to complete tasks on a spaceship.", price: 4.99, rating: 4.4, releaseDate: new Date("2018-06-15"), }, { title: "Animal Crossing: New Horizons", description: "A life simulation game where players can build and manage their own island.", price: 59.99, rating: 4.9, releaseDate: new Date("2020-03-20"), }, { title: "Hades", description: "A rogue-like dungeon crawler where players fight their way out of the Underworld.", price: 24.99, rating: 4.9, releaseDate: new Date("2020-09-17"), }, ];4: Upload Images to Cloudinary
Section titled “4: Upload Images to Cloudinary”Next, you will need to create an account with Cloudinary.
- Navigate to the Cloudinary sign-up page and sign up for a free account.
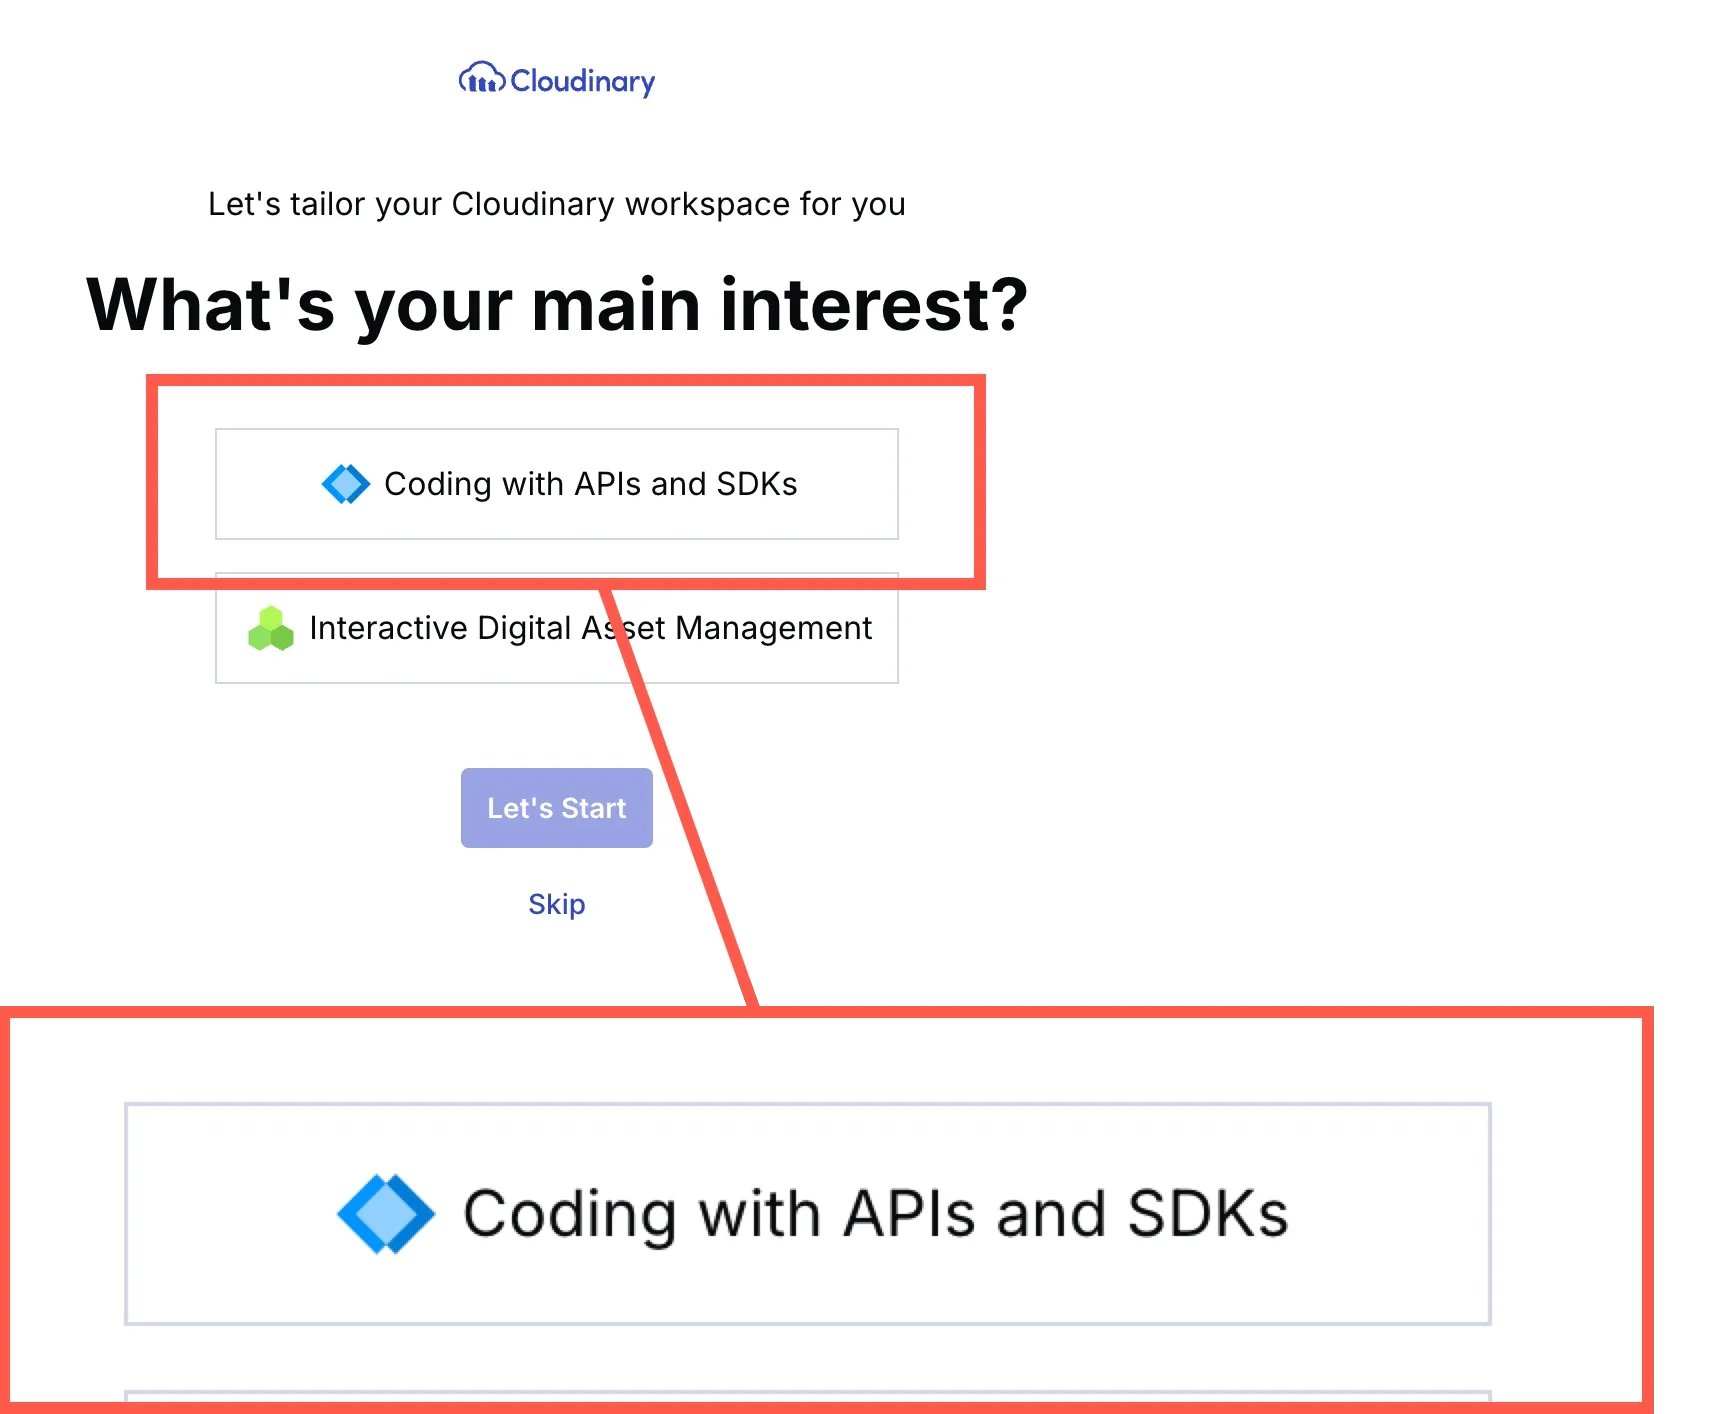
- Once you have created an account, you will be presented the question below. Select the option shown below:
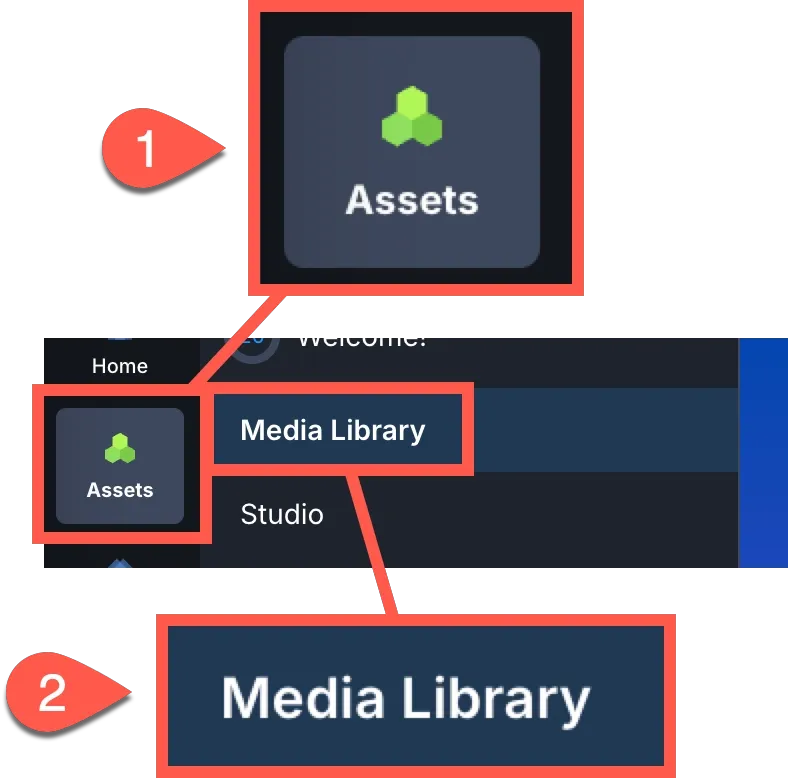
- Navigate to AssetsMedia Library.
- Click the Upload button and select the images you want to upload.

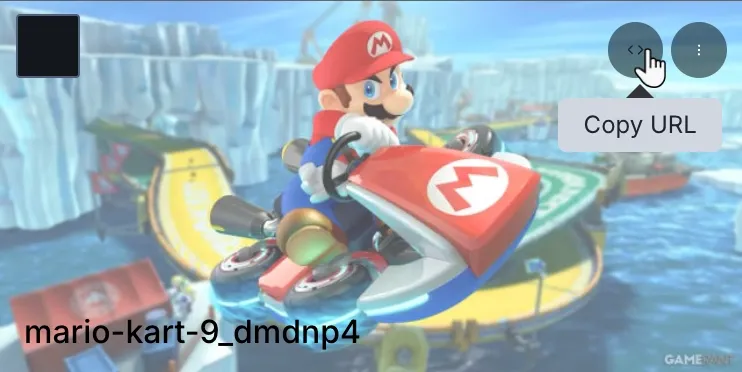
- Once the images have uploaded, click on each one to view its details.
- Copy the URL for each image, as we will need these in the next step:
5: Update the Seed Data
Section titled “5: Update the Seed Data”Now that we have the new field in our database, we should update our seed data to include image URLs for our games.
Open the prisma/seed.ts file in your code editor, and add the code shown below.
6: Apply the Updated Seed Data
Section titled “6: Apply the Updated Seed Data”Now that we have updated the seed data, we need to apply these changes to our database. Run the following command:
npm run setupAfter hitting enter, you will be asked to confirm if you want to delete all data in the database. Click ‘y’ to confirm.
This will delete all data in the database and re-run the seed file.
It will update your database with the new image URLs for each game.
You can check the database to confirm the changes have been applied by running the following command:
npx prisma studioYou should see the new imageUrl field in the Game table, with a URL for each game.
What We’ve Learned
Section titled “What We’ve Learned”In this tutorial, we’ve:
- Updated our Prisma schema to include a new field for storing image URLs
- Created and applied a database migration to update our database schema
- Updated our seed data to include image URLs for our games
- Applied the updated seed data to our database
These changes prepare our application to display images for each game, which will make our UI more visually appealing and informative.
Next Steps
Section titled “Next Steps”Now that we have image URLs stored in our database, we can update our GameCard component to display these images instead of using placeholder images. This will be covered in the next guide.
Great job! You’ve successfully updated your database schema and seed data to include images for your games.
This is a common task in web development, and Prisma makes it easy with its migration system.
In the next guide, we’ll use these image URLs to display actual game images in our UI.