Modify the project structure
Objectives
Section titled “Objectives”Now that we have updated the Prisma schema and pushed these changes to the database, we need to update the project structure to reflect these changes.
Update permissions
Section titled “Update permissions”The first thing we need to do is update the permissions in the app/utils/user.ts file.
Permissions describe what actions a user can perform on a specific entity. In our case, we are concentrating on two entities: user and article.
-
Open the
app/utils/user.tsfile. -
We will update the
Entitytype definition to accept'article'as well as'user'and'note'.Around line 28, add the code below:
app/utils/user.ts 25 collapsed linesimport { type SerializeFrom } from '@remix-run/node'import { useRouteLoaderData } from '@remix-run/react'import { type loader as rootLoader } from '#app/root.tsx'function isUser(user: any): user is SerializeFrom<typeof rootLoader>['user'] {return user && typeof user === 'object' && typeof user.id === 'string'}export function useOptionalUser() {const data = useRouteLoaderData<typeof rootLoader>('root')if (!data || !isUser(data.user)) {return undefined}return data.user}export function useUser() {const maybeUser = useOptionalUser()if (!maybeUser) {throw new Error('No user found in root loader, but user is required by useUser. If user is optional, try useOptionalUser instead.',)}return maybeUser}type Action = 'create' | 'read' | 'update' | 'delete'type Entity = 'user' | 'note' | 'article'type Access = 'own' | 'any' | 'own,any' | 'any,own'export type PermissionString =| `${Action}:${Entity}`| `${Action}:${Entity}:${Access}`// ...Code omitted for brevity... -
Remember to save your changes before moving on to the next step.
Add getArticleImgSrc function
Section titled “Add getArticleImgSrc function”Inside the utils folder, there is a file called misc.tsx.
-
Open
app/utils/misc.tsx. -
Create a new function called
getArticleImgSrcby adding the code below:This simply generates a URL for an article image:
app/utils/misc.tsx import { useFormAction, useNavigation } from '@remix-run/react'import { clsx, type ClassValue } from 'clsx'import { useEffect, useMemo, useRef, useState } from 'react'import { useSpinDelay } from 'spin-delay'import { extendTailwindMerge } from 'tailwind-merge'import { extendedTheme } from './extended-theme.ts'export function getUserImgSrc(imageId?: string | null) {return imageId ? `/resources/user-images/${imageId}` : '/img/user.png'}export function getNoteImgSrc(imageId: string) {return `/resources/note-images/${imageId}`}export function getArticleImgSrc(imageId: string) {return `/resources/article-images/${imageId}`} -
Save your changes.
This new function simply generates a URL to load an article image from the database. However, the file for this new URL doesn’t exist yet.
Let’s create it in the next step.
Resources routes
Section titled “Resources routes”The route file we are going to create is a little different from the others we have created so far. We are going to create something called a resource route.
Create article-images.$imageId.tsx
Section titled “Create article-images.$imageId.tsx”-
Create a new file inside
app/routes/resources+/calledarticle-images.$imageId.tsx: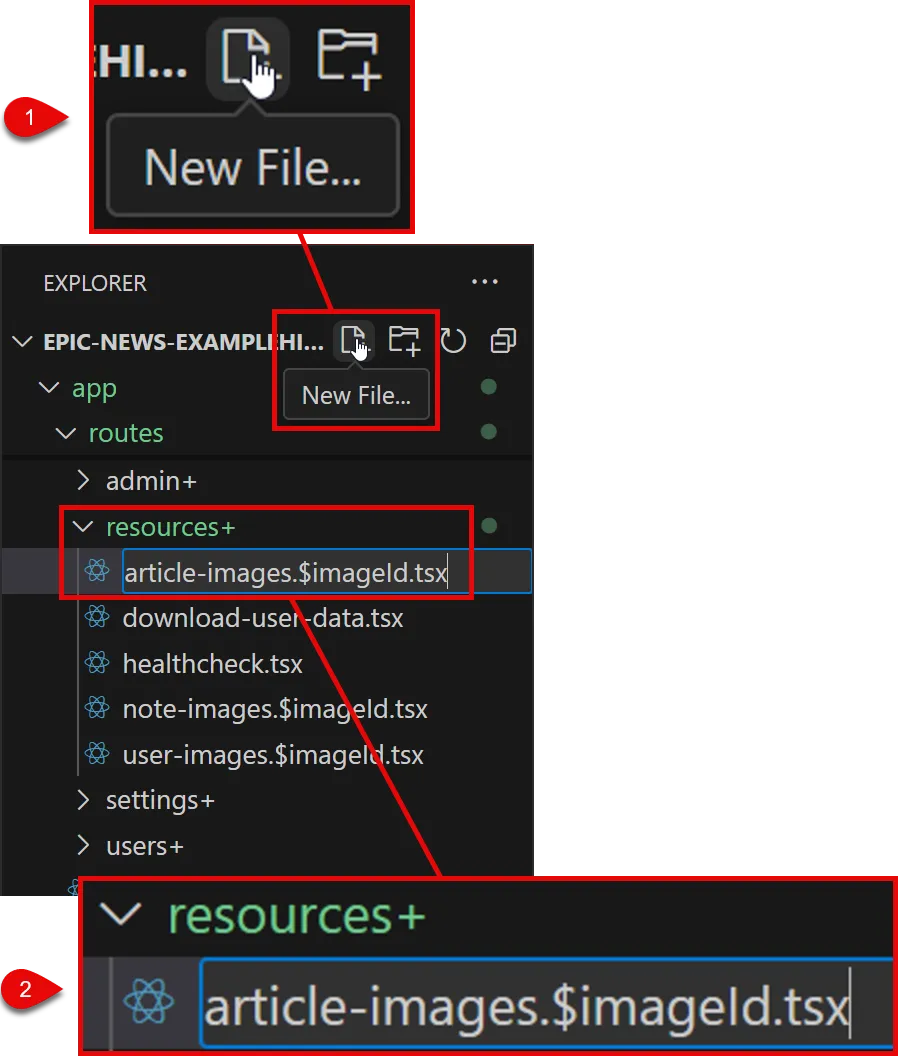
-
Add the code below to it:
app/routes/resources+/article-images.$imageId.tsx import { invariantResponse } from '@epic-web/invariant'import { type LoaderFunctionArgs } from '@remix-run/node'import { prisma } from '~/utils/db.server.ts'export async function loader({ params }: LoaderFunctionArgs) {invariantResponse(params.imageId, 'Image ID is required', { status: 400 })const image = await prisma.articleImage.findUnique({where: { id: params.imageId },select: { contentType: true, blob: true },})invariantResponse(image, 'Not found', { status: 404 })return new Response(image.blob, {headers: {'Content-Type': image.contentType,'Content-Length': Buffer.byteLength(image.blob).toString(),'Content-Disposition': `inline; filename="${params.imageId}"`,'Cache-Control': 'public, max-age=31536000, immutable',},})}-
Save your changes.
-
Take a moment to look through the code, and see if you can understand what it does.
What do you notice is missing from this route file that is present in the others?
-
Add user-article routes
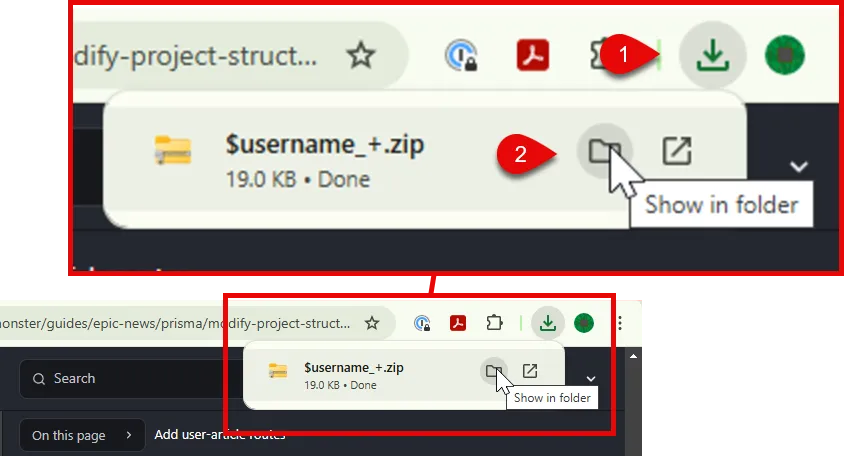
Section titled “Add user-article routes”Using VS Code’s file explorer, navigate to the folder app/routes/users+/$username_+.
To manually update each of these files inside $username_+ would take a disproportionately long time, so instead you can download an updated version of this folder here:
-
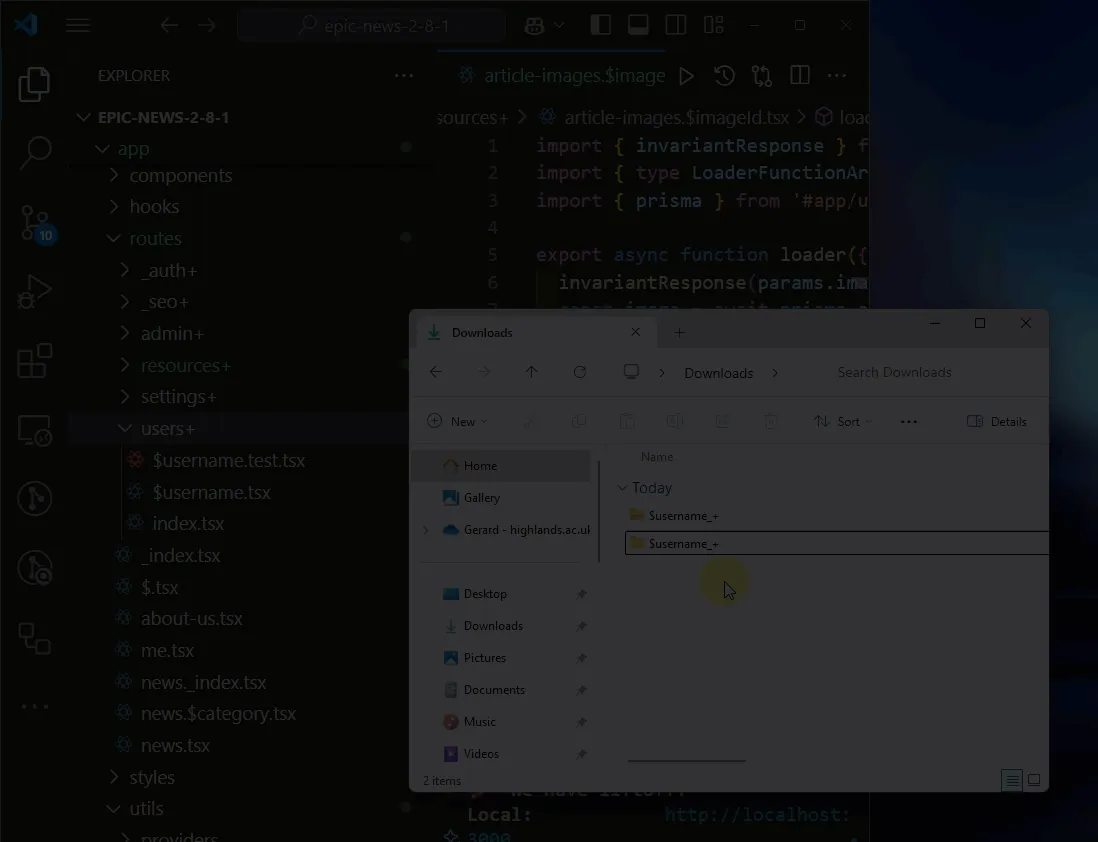
After clicking on the blue download button above, navigate to your browser’s download button and click to ‘Show in Folder’
-
Open the Downloads folder on your computer, right-click on the
$username_+.zipfile, and select ‘Extract All…’.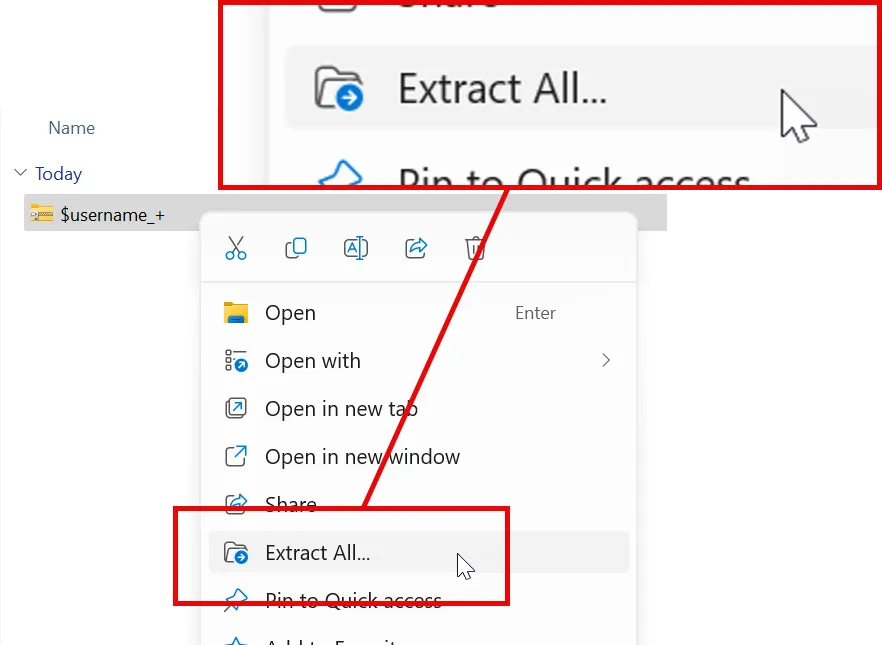
-
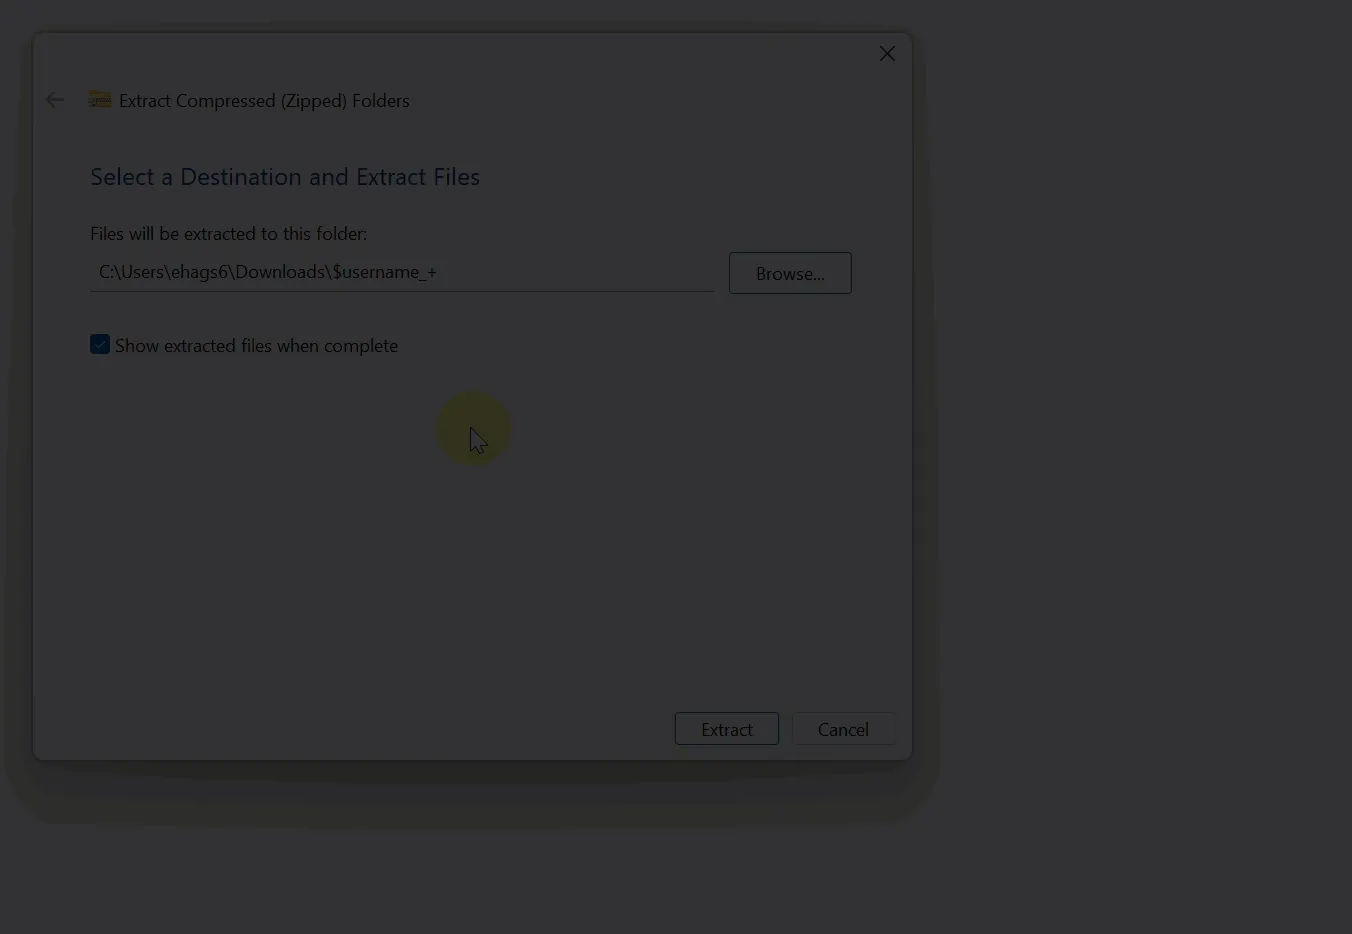
In the pop-up window that appears, click ‘Browse’. Navigate to your ‘Downloads’ folder again, click ‘Select Folder’, and finally click ‘Extract’ to unzip the folder.
Watch the gif below to make sure you extract the folder correctly:
-
Once you have extracted the folder, you are ready to replace the existing
app/routes/users+/$username_+folder with the new one.Start by right-clicking the existing
$username_+folder in your project (located atapp/routes/users+/$username_+) and selecting ‘Delete’.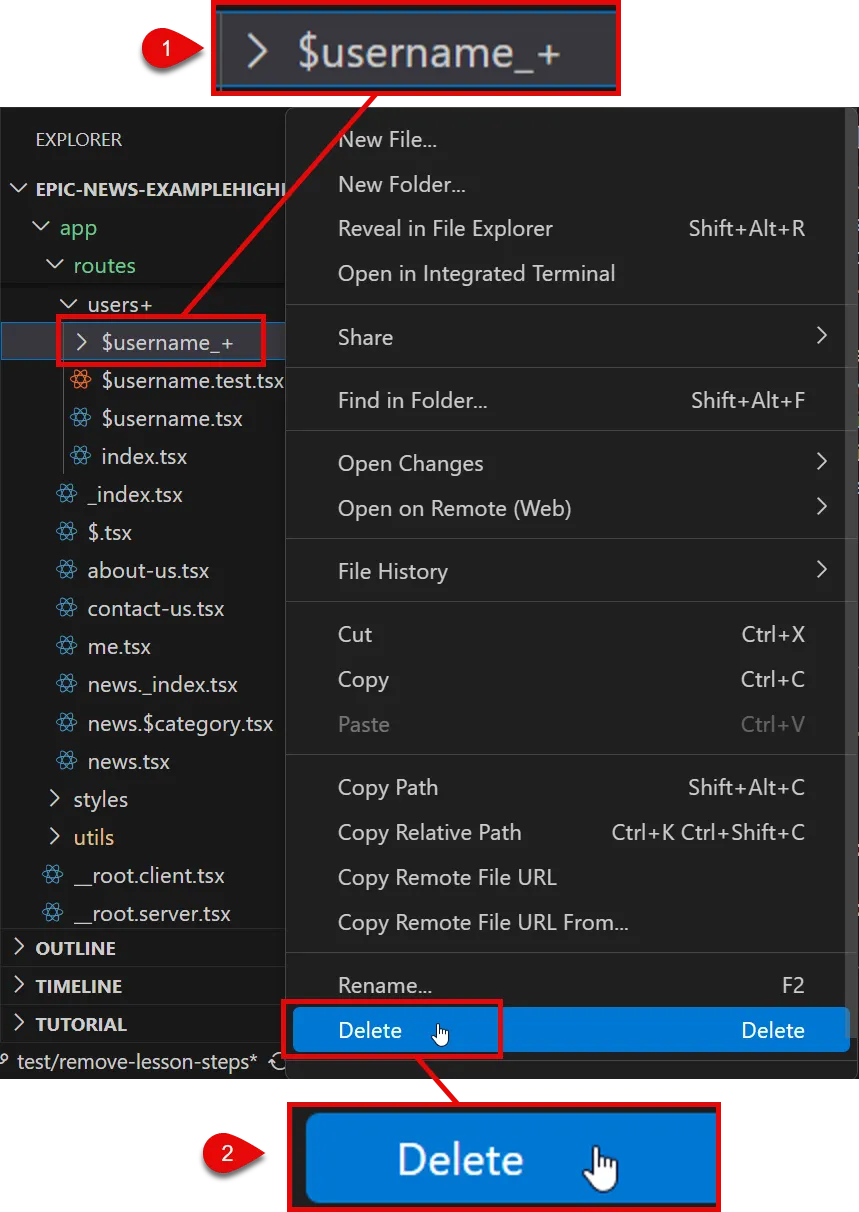
-
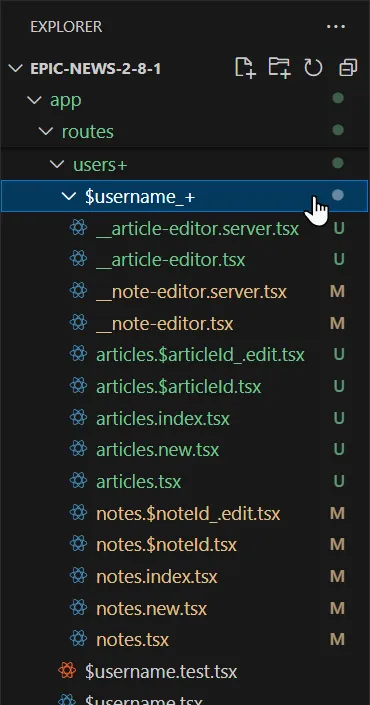
Finally, drag the new
$username_+folder from your Downloads folder into theapp/routes/users+folder in your project.Watch the gif below carefully to make sure you drag the new folder into the correct location:
If placed correctly, your new folder structure should look like this:
Replace the seed data
Section titled “Replace the seed data”Finally, we need to update the seed.ts file so that we can populate the database with new test data that reflects the changes we have made.
-
Delete the existing seed file at
prisma/seed.ts.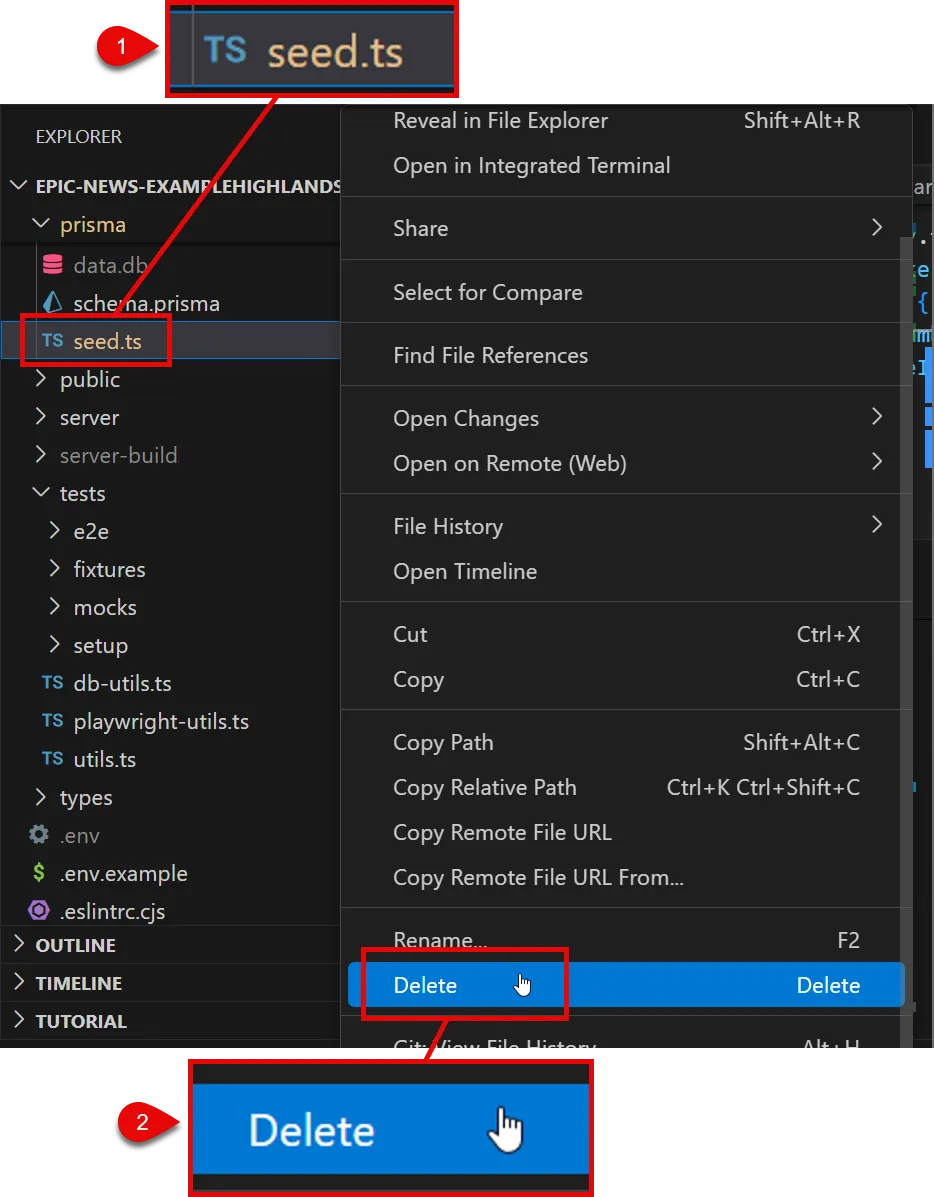
-
Download the new seed file by clicking the link below:
seed.zip -
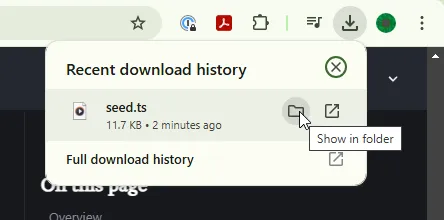
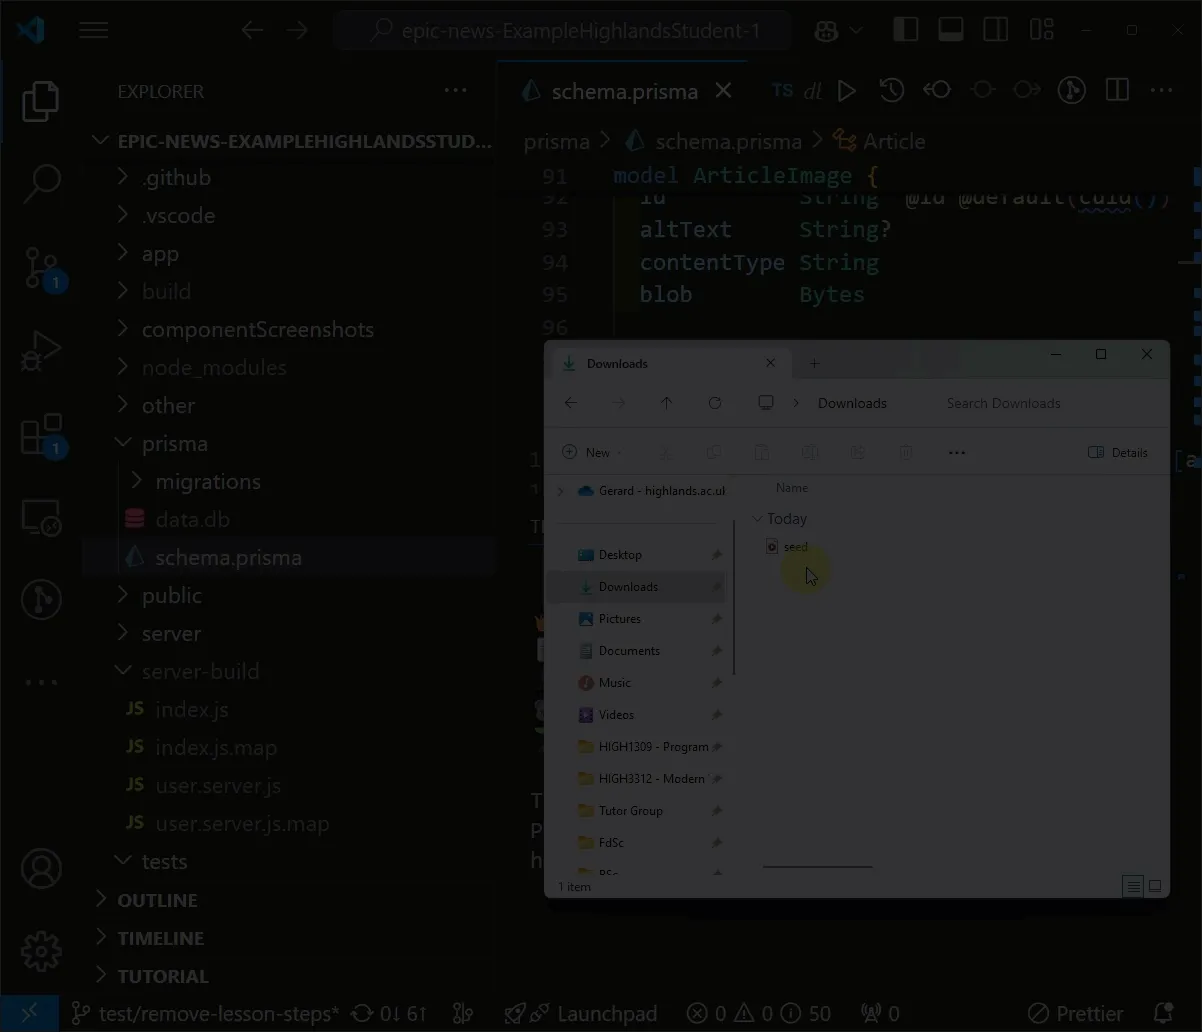
Click the download icon in your browser and select ‘Show in folder’.
-
Open the zip file.
Drag the downloaded
seed.tsfile into theprismafolder in your project.Take extra care to place the file in the correct location.
Run the seed script
Section titled “Run the seed script”Now that we have updated the seed script, we can run it to populate the database with new dummy data.
To do this, run the following command in your terminal:
npm run setupAfter a few moments, you should see something similar to the following output (the time taken may vary):
Running seed command `tsx prisma/seed.ts` ...🌱 Seeding...prisma:query - 36ms - DELETE from "User"🧹 Cleaned up the database...: 62.516ms🔑 Created permissions...: 11.604ms👑 Created roles...: 26.458ms📝 Created article categories...: 27.36ms👤 Created 5 users...: 1.489s🐨 Created admin user "kody": 673.453ms🌱 Database has been seeded: 2.292s
The seed command has been executed.After seeing this message, we are ready to check the new database in Prisma Studio.
Run the following command in your terminal:
npx prisma studioYou should see your database has been populated with new data:
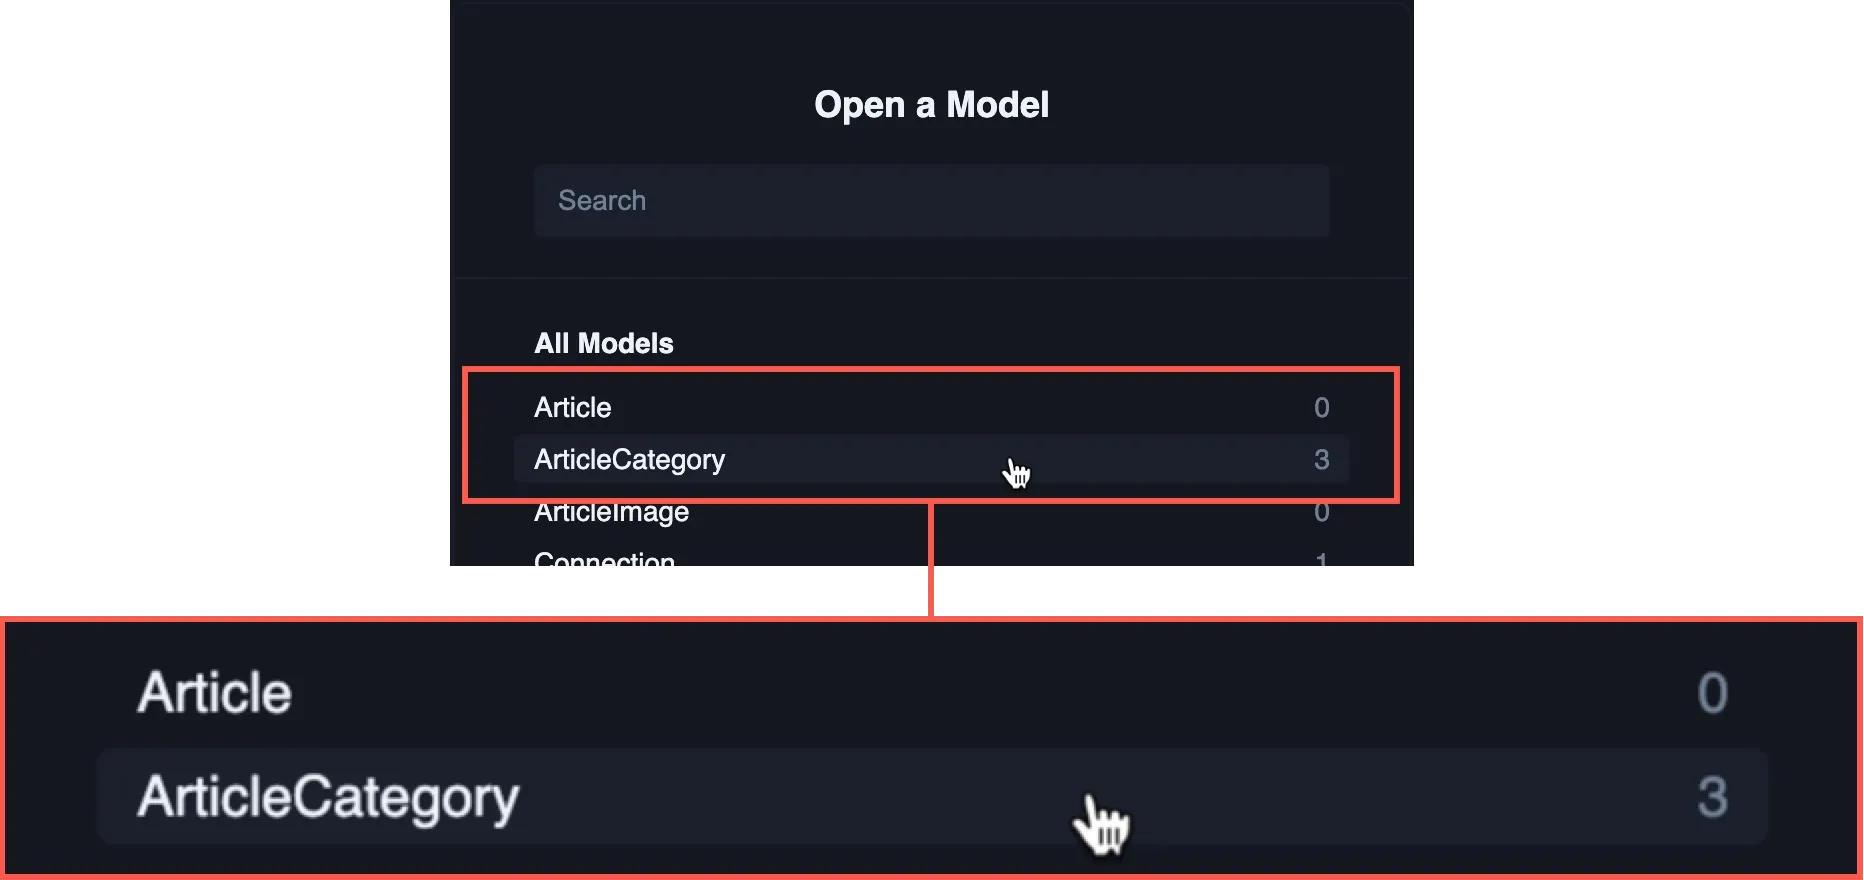
Feel free to click into the database and explore how the categories appear in the new table.
Summary
Section titled “Summary”In this tutorial, we updated the project structure to reflect the changes we made to the Prisma schema.
- We updated the permissions in the
app/utils/permissions.tsfile to reflect the new entity name. - We replaced the
notefiles in theapp/routes/users+/$username_+folder with the updatedarticlefiles. - Updated the seed data to include new article categories and dummy articles.
What’s next?
Section titled “What’s next?”In the next tutorial, we will modify the seed data to include some article categories and dummy articles that will be used to populate the database.