Committing to GitHub
Introduction
Section titled “Introduction”Now that you’ve made some changes to your code, it’s time to commit them to GitHub.
Committing your changes is an essential part of the coding process, as it allows you to save your work and keep track of the changes you’ve made.
In this guide, you will learn how to commit your code changes to GitHub using Github Desktop.
Committing your changes
Section titled “Committing your changes”Step 1: Open Github Desktop
Section titled “Step 1: Open Github Desktop”Open Github Desktop on your computer.
If you are not already authenticated, you will need to sign in using your GitHub account.
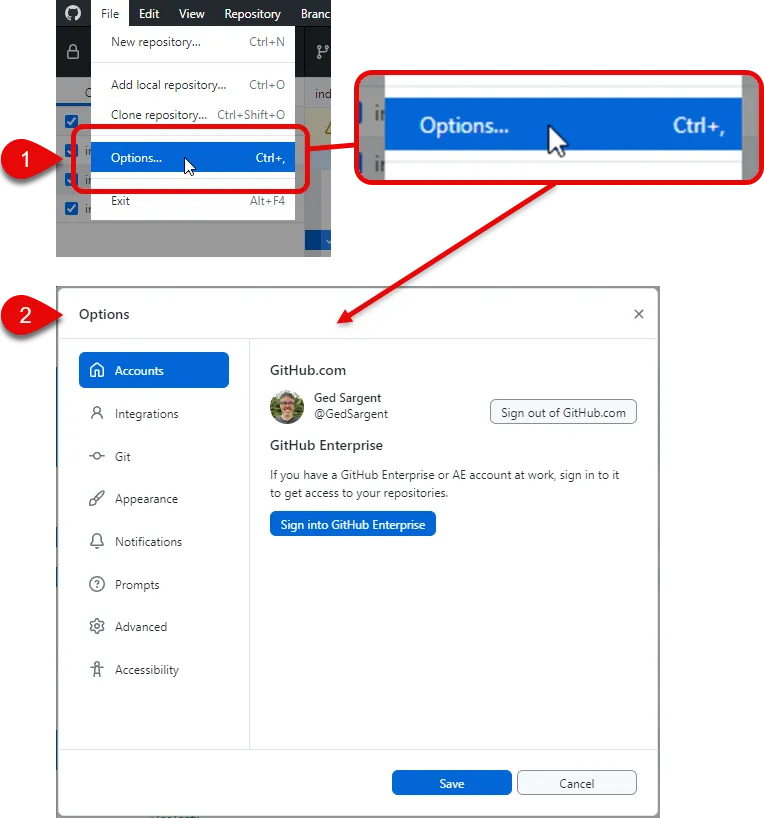
Check you are in the correct project by examining the ‘Current repository’ dropdown in the top left corner.

Step 2: Review your changes
Section titled “Step 2: Review your changes”Before committing your changes, it’s a good idea to review them.
-
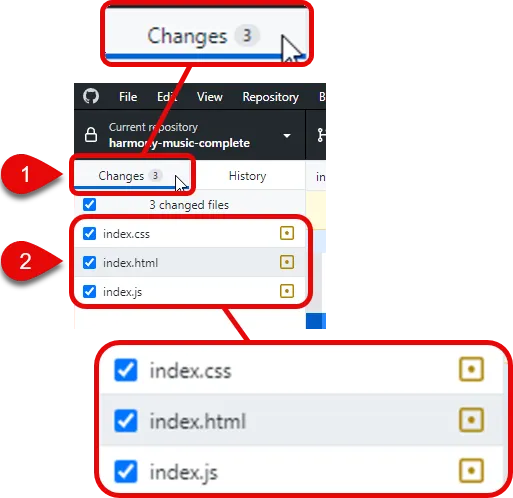
You can do this by clicking on the ‘Changes’ tab in Github Desktop (if it is not already selected).
-
Directly beneath the ‘Changes’ tab, you will see a list of all the files that have been modified
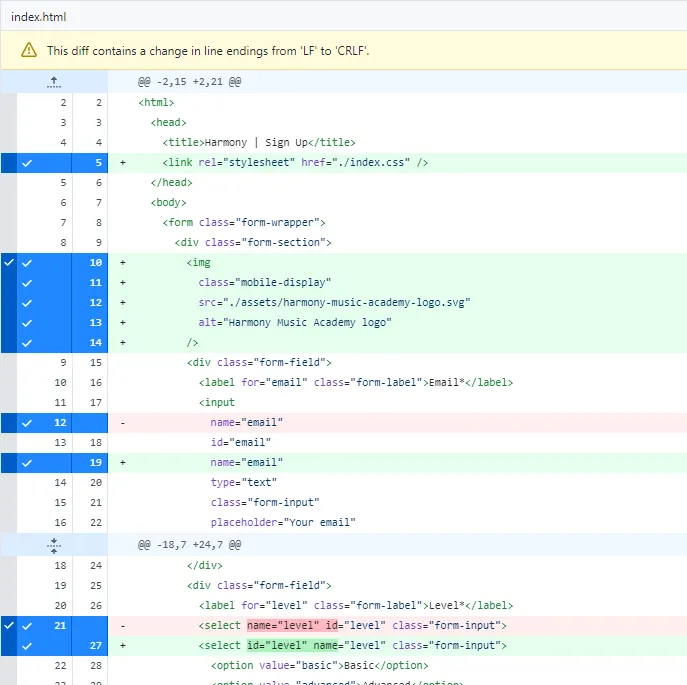
When you click on a file, you will see a side-by-side comparison of the changes you’ve made in the large panel on the right.
Lines highlighted in green represent new code that has been added.
Lines highlighted in red represent code that has been removed.
Step 3: Commit your changes
Section titled “Step 3: Commit your changes”Once you are happy with the changes you’ve made, it’s time to commit them.
-
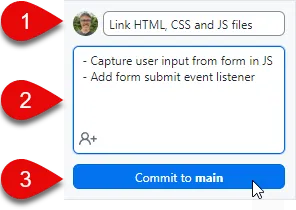
In the ‘Summary’ field to the bottom left of the screen, write a brief description of the changes you’ve made.
e.g. “Link HTML, CSS and JS files”, “Capture user input”, “Add event listeners”
-
In the ‘Description’ field, you can provide more detailed information about the changes if you wish.
-
Click the ‘Commit to main’ button to commit your changes.
Step 4: Push your changes to GitHub
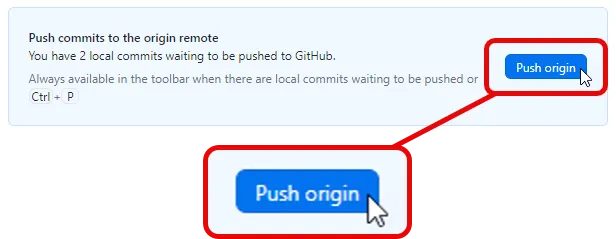
Section titled “Step 4: Push your changes to GitHub”After a few moments, your changes will disappear and the large right-hand panel will be replaced with various options for the project.
Your changes have now been ‘committed’ to Git. You will need to push them to GitHub.
Click the ‘Push origin’ button in the top right panel of the screen.
Step 5: Verify your changes on GitHub
Section titled “Step 5: Verify your changes on GitHub”Once you have pushed your changes to GitHub, you can verify that they have been successfully uploaded by visiting your repository on GitHub.
The quickest way to do this is to click the ‘View on GitHub’ button in the right panel of the screen.
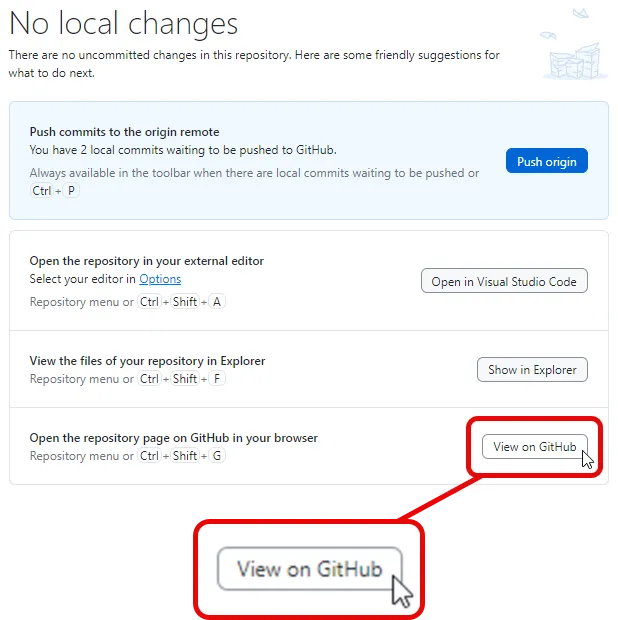
You should see your changes reflected in the repository on GitHub.
Summary
Section titled “Summary”In this guide we have:
- Reviewed the changes you’ve made to your code
- Committed your changes to GitHub
- Pushed your changes to GitHub
- Verified your changes on GitHub
Next steps
Section titled “Next steps”- Continue working on your project.
In the next step, we will look at how to debug problems in your code using VS Code.