Show article images (optional)
Introduction
Section titled “Introduction”We are currently only fetching the id of each image from the database. To display the images on the page, we will need to generate a src for each image using a utility function from the Epic Stack.
Configuring ArticleCard
Section titled “Configuring ArticleCard”-
Open
app/routes/news.$category.tsx.To display the article images on the page, we need to pass the
idof each article image to theArticleCardcomponent.This
idwill be used to generate thesrcfor each article image using thegetArticleImgSrcfunction.Add the line of code below to pass the
idof the first article image to theArticleCardcomponent:app/routes/news.$category.tsx 24 collapsed linesimport { invariant } from '@epic-web/invariant'import { type LoaderFunctionArgs, json } from '@remix-run/node'import { useLoaderData } from '@remix-run/react'import ArticleCard from '#app/components/organisms/ArticleCard.tsx'import { prisma } from '~/utils/db.server.ts'import { toTitleCase } from '~/utils/stringUtils.ts'export async function loader({ params }: LoaderFunctionArgs) {const { category } = paramsinvariant(typeof category === 'string', 'Category not found')const categoryTitle = toTitleCase(category)const allArticles = await prisma.article.findMany({select: {id: true,title: true,category: { select: { name: true } },images: { select: { id: true } },},})return json({ categoryTitle, allArticles })}export default function NewsCategoryPage() {const { categoryTitle, allArticles } = useLoaderData<typeof loader>()return (<div className="container py-16"><h2 className="mb-8 text-h2">{categoryTitle}</h2><div className="grid grid-cols-2 gap-6 md:grid-cols-3 lg:grid-cols-5">{allArticles.map(article => (<ArticleCardkey={article.id}title={article.title}category={article.category?.name}objectKey={article.images[0]?.objectKey}/>))}</div></div>)} -
Open your
ArticleCardcomponent. -
Add the following import statements at the top of the
ArticleCardcomponent file to import thegetArticleImgSrcfunction:app/components/organisms/ArticleCard.tsx import { type ReactElement } from 'react'import {MdOutlineBusinessCenter,MdOutlineTheaters,MdOutlineDesktopMac,MdOutlineNewspaper,} from 'react-icons/md'import { getArticleImgSrc } from '~/utils/misc.tsx'import siteLogo from '~/assets/svg/site-logo.svg' // !!! Change to your own logo!!!27 collapsed linesinterface ArticleCardProps {title: stringcategory?: string}export default function ArticleCard({title,category = 'General news',}: ArticleCardProps) {const categoryIcons: { [key: string]: ReactElement } = {Business: <MdOutlineBusinessCenter size={20} className="text-red-300" />,Entertainment: <MdOutlineTheaters size={20} className="text-red-300" />,Technology: <MdOutlineDesktopMac size={20} className="text-red-300" />,'General news': <MdOutlineNewspaper size={20} className="text-red-300" />,}return (<div className="flex h-64 cursor-pointer flex-col justify-between rounded bg-red-900 p-4 transition-all duration-500 hover:scale-110"><h3 className="line-clamp-3 text-xl font-bold">{title}</h3><div className="flex items-center gap-2">{categoryIcons[category]}<p className="text-sm text-red-300">{category}</p></div></div>)} -
With this in place, let’s now modify the logic inside our
ArticleCardcomponent to display the article image above the title:app/routes/news.$category.tsx 9 collapsed linesimport { type ReactElement } from 'react'import {MdOutlineBusinessCenter,MdOutlineTheaters,MdOutlineDesktopMac,MdOutlineNewspaper,} from 'react-icons/md'import siteLogo from '~/assets/svg/site-logo.svg'import { getArticleImgSrc } from '~/utils/misc.tsx'interface ArticleCardProps {title: stringcategory?: stringobjectKey?: string}export default function ArticleCard({title,category = 'General news',objectKey,}: ArticleCardProps) {const imageSrc = objectKey ? getArticleImgSrc(objectKey) : siteLogo6 collapsed linesconst categoryIcons: { [key: string]: ReactElement } = {Business: <MdOutlineBusinessCenter size={20} className="text-red-300" />,Entertainment: <MdOutlineTheaters size={20} className="text-red-300" />,Technology: <MdOutlineDesktopMac size={20} className="text-red-300" />,'General news': <MdOutlineNewspaper size={20} className="text-red-300" />,}return (<div><div><img src={imageSrc} alt={title} /></div><div className="flex h-64 cursor-pointer flex-col justify-between rounded bg-red-900 p-4 transition-all duration-500 hover:scale-110"><h3 className="line-clamp-3 text-xl font-bold">{title}</h3><div className="flex items-center gap-2">{categoryIcons[category]}<p className="text-sm text-red-300">{category}</p></div></div></div>)} -
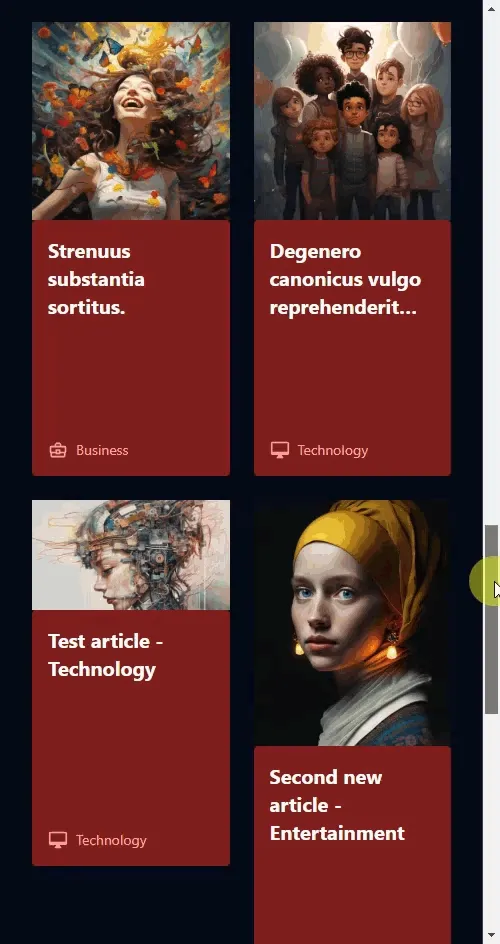
Check the browser. You should now see the article images displayed above the title on each article card, although they are not perfect yet:
Summary
Section titled “Summary”In this guide, we learned how to:
- Pass the
idof each article image to theArticleCardcomponent - Use the
getArticleImgSrcfunction to generate thesrcfor each article image - Display the article images above the title on each article card
- Style the article images to make them a consistent size and shape
In the next guide, we will learn how to filter articles by the correct category.